How to setup your own home recording studio including the hardware and software involved and tackles the problem of latency
Mic and Mic stand
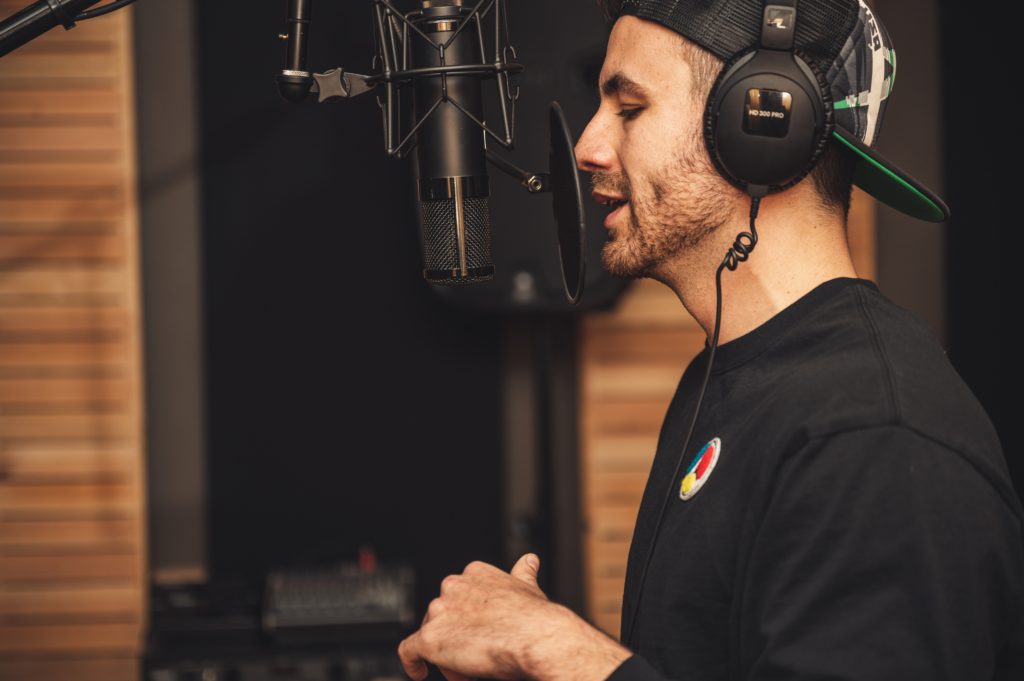
There are 2 basic types of reasonably priced microphone; Dynamic and Condenser. If like most people, you don’t have the luxury of a sound-proofed room, and are setting up a studio in your bedroom or spare room, you’ll need to consider background noise, the condenser mic will pick up traffic noises, doors closing, shouting, talking, EVERYTHING. The trade-off being it’ll capture the dynamics (the top end in particular) of your voice and acoustic guitar far better than the dynamic mic. On the other hand the dynamic mic won’t pick up as much background noise but will lose some of the dynamics.
In my situation, recording in my bedroom next to a busy road, a condenser is simply too sensitive resulting in unusable takes with far too much background noise, so I use the industry standard Shure SM58 dynamic mic.
As far as mic stands go, make sure it’s a fully extendible vocal mic stand as you’ll be needing it to capture vocals and acoustic guitar.
A decent PC with as much RAM as you can get.
RAM is fairly cheap, readily available, and the single most important factor in building a stable system to handle all your recording hardware and software. Try and go for 16GB of RAM if you can. A lower amount of RAM will work, but as you add tracks, plugins, effects etc to your projects, you’ll get noticeable performance issues that’ll frustrate and kill the recording mood.
…….Of course a faster processor and graphics card won’t hurt either
A DAW (Digital Audio Workstation)
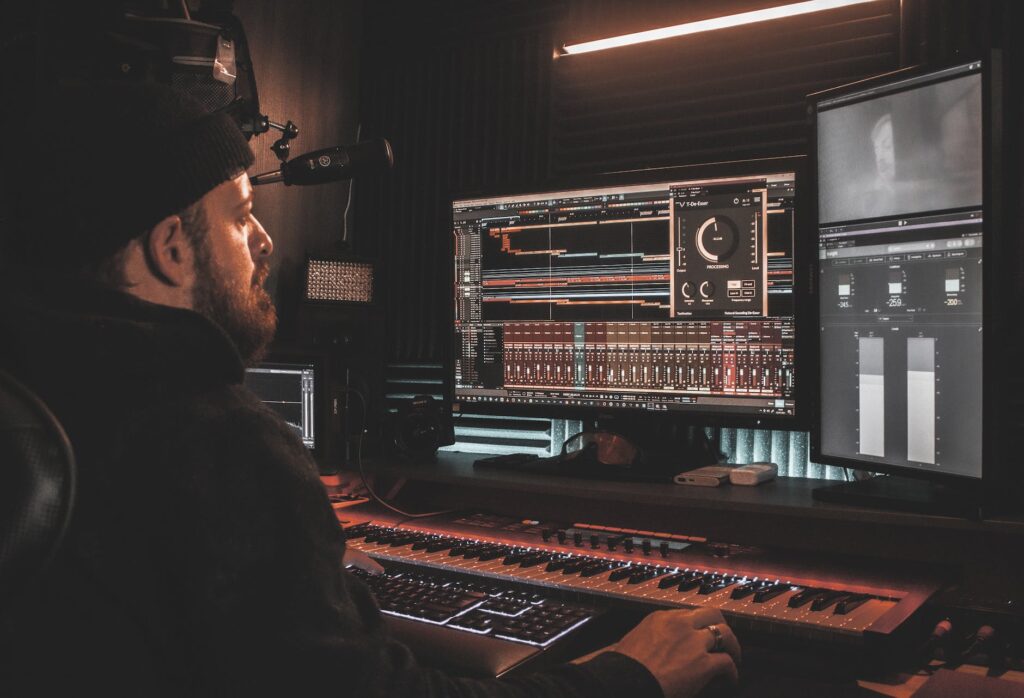
The DAW (Digital Audio Workstation) is a piece of software you install on your PC. It’s the nerve-center, your multi-track studio used to manage all your recording, editing, mixing and mastering. There are a number of commercially available DAWs out there: Steinberg Cubase, Cakewalk Sonar, Avid Protools and Ableton Live are the most popular for Windows PC’s. To start with, Reaper is free and contains most of the features of the others, but I’ve found Ableton Live to be the easiest to work with and most fun to use without breaking the musical flow.
DAWs are a million miles away from the old standalone recorders of a few years back, giving you (in some cases) unlimited tracks, automation (e,g. change the volume of a track in certain parts automatically) , far superior editing, plus all the flexibility of effects and MIDI instruments (e.g. synthesizers). You can save a mix, come back to it later, improve it, even have multiple copies of a mix to compare.
A plugin is a third-party piece of software that adds features, sounds and tools to your DAW. Three plugins I can’t do without are:
- Pitch Correction. Invaluable for tightening up vocals and drastically cuts down on vocal takes. The industry standard is Antares Autotune and although there are others, (e.g. melodyne) Autotune is just simple and works.
- Drums. A dedicated drum plugin will take a lot of the pain out of manually creating drum loops or searching through the libraries of MIDI loops included in most DAWs. Some great examples are XLN Addictive drums and FXpansion BFD, but for ease of use, sounds, varied patterns and composition tools, I use ToonTrack EZDrummer 2.
- Mastering. All DAWs come with mastering tools, but for me it’s always been a bit of minefield finding and applying what’s available either on individual tracks or the Master Track. A dedicated mastering suite of effects (such as iZotope Ozone) placed on the Master Track seems enough for me to apply the finish polish to a mix.
Of course you may also wish to add synthesizers, piano, strings or any other instrument, effect or sound that captures your imagination. The sky really is the limit with DAWs, either they’ll be included as a ‘Virtual Instrument’ within the DAW, or you can add 3rd party instruments via other plugins, both free and paid for.
Latency
‘Latency’, or the delay you hear when a sound is played back through hardware (e.g. a PC) , is the bane of home recording. It messes up your timing and spoils your artistic flow. A classic example of this is vocals. Processing the dry audio signal by adding effects in the DAW will cause a delay in the monitored vocals (the vocals you hear back through your headphones or speakers while recording), depending on your PC and audio interface spec, the amount of processing across all tracks, and any other processes the hardware and software is having to deal with, this could be just milliseconds or more seriously anything above a quarter of a second. Recording a vocal take (or any other type of take for that matter) is all about timing, so this is a major issue to be avoided.
Digital Audio Interface.
Here’s where it gets complicated.
To record audio onto a PC you’ll need some sort of interface to accept the sound source (be it a mic if recording vocals or acoustic, or a guitar cable if recording guitar). Here are the options….
- A new PC soundcard. The simplest ‘solution’ is upgrading your PC sound card to a type that accepts mic + 1/4″ cable inputs (for guitar). This’ll will get your unprocessed, dry electric guitar and vocals onto tape, However, like 99% of musician’s I much prefer an affected vocal while recording (EQ, compression, reverb etc), something only the expensive, highest end professional sound cards achieve. In practice you need to apply your effects ‘post’ the interface, ie. add reverb to the dry signal in your DAW, so you’ll hear back your affected vocals through the monitor mix. Unfortunately this introduces the dreaded problem of ‘Latency’ (see box to the right). In addition to this, audio sound cards often don’t use the best quality audio connections (1/4 jacks, mic inputs). So now we move onto option 2……
- USB Audio Interface. This is a dedicated, stand-alone interface for recording audio which is connected to the PC via a USB cable. All the connections are handled in a single unit, and are far superior to the connections found on a standard PC sound card, with most including dedicated guitar inputs too. The market is flooded with these units of varying quality, but again you are still restricted to a dry monitored signal (and latency). Some of the more expensive units do have the option to add effects (compression, eq, reverb etc) to the dry signal for monitoring, but these effects are very limited, and mainly geared towards just vocals.
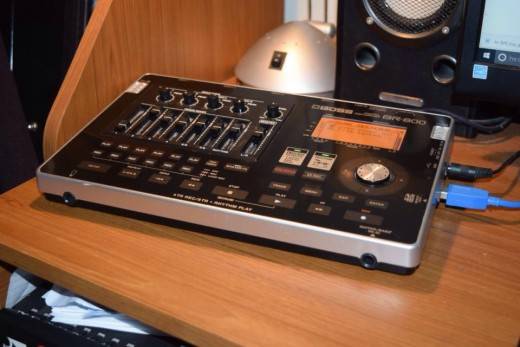
- USB Audio Interface with full signal processing. In the ideal word, you’ll want to monitor and record your vocals with vocal effects, and your electric guitar, bass, and acoustic guitar through a dedicated processor for each, with no fuss and no latency. In actual fact the only piece of desktop hardware I’ve found that can achieve this is the BOSS BR-800 (until the recent BOSS GT-001 came along). This gives you the best of both worlds. you don’t have to have a dry monitored signal, and you can also add extra effects (e.g. mastering effects) post recording in your DAW.
Of course the old fashioned way of recording electric guitar is to simply mic your amp, but to get a half decent sound this way you’ll need to make one hell of noise and experiment with mic placement etc. Not great for bedroom recording. I’ve found I can get comparable, if not better tones much simpler and quicker by just using the amp sims on the BR-800.
By all means you could just go ahead and upgrade your PC sound card, recording everything dry. It would certainly be a neater solution, but in my experience this just leaves you feeling uninspired as you wrestle with the technology, recording flat sounding vocals and sterile clean guitar parts. Not what you want when your trying to get creative, inspiring ideas down on tape.
Monitors and Headphones
Invest in a good quality set of over-ear headphones with a long cable, Try to steer clear of anything too complex with too many functions, separate volume controls, bass-boosts as these will just distract you from recording and give you something else to break/worry about. What you want is a flat, clear representation of what you’ve recorded as any coloration of the original sound will confuse the final mix. Over-the-ear headphones are best as they block out the most background noise. Currently I use a pair of Sennheiser HD429s.
For mixing purposes, you’ll also need some decent monitor speakers. Like the headphones it’s best to look out for the simplest layout and flattest response. Position them either side of your PC monitor so you get a decent left/right spread. You can’t always monitor through headphones, during mix-down especially, because everything always sounds better through headphones so you have no idea of how your mix will sound in the real world. Monitors give you a completely different perspective on the overall mix, and to produce a really great final mix you’ll need to play back your work through as many different devices as you can. (a tiny smartphone speaker is the ultimate test of a decent mix).
I prefer to record vocals without headphones, using the monitors as it gives a more natural and comfortable environment. It also helps me with my pitch somehow.
Decent monitors aren’t cheap, but you don’t have to use them just for recording, they’ll be connected up you your PC too, so with the BR-800, Youtube and Window Media Player I now have the ideal practice setup too. For monitors, I use Edirol MA-7A’s
My Home Recording Studio Setup

Putting it all Together
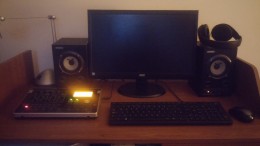
Here’s my setup, which I use for practicing and recording.
- Guitar and/or Mic connects to the BOSS BR-800.
- BOSS BR-800 connects to my PC. This BR-800 is then selected as the audio Interface in the DAW so we can record audio to it and play back audio from it.
- Left/Right output of The BR-800 connected to the monitors. So that we can hear back what we are recording without going through the PC (causing latency),
- Stereo output of the PC soundcard connects to the line-in of the monitors. This allows me to play Youtube videos or Windows Media Files through the speakers for practicing. While using the BR-800 for my guitar sounds.
- Headphones into the Headphone socket of the Monitors.
Thanks for reading!
I hope this guide has been useful to all you budding singer-songwriters out there. You don’t need to spend a fortune on studio time; set up your own and learn to produce music yourself, it’s ten times more rewarding, it’s more fun, you can do it the way you want, when you want and lastly you’re learning an invaluable new skill as a recording engineer.
I haven’t gone into any detail about how to actually use the software, that’s too big a topic for this hub, but just to show you what can be achieved relatively quickly, here’s some examples of my own work created at my own home studio using some of the tools mentioned above. I hope you like them, and maybe in future hubs I’ll reveal some recording tips and tricks.


