
By Gary Heimbauer for Guitar Tricks and 30 Day Singer
Power chords are at the heart of rock and roll! Bands as diverse as The Ramones, AC/DC, and Nirvana all used them constantly to create many great songs. So what is a power guitar chord? In this beginner guitar lesson, we will find out!
A power chord is a combination of two notes – a starting note, and then a note that is the interval or distance of a fifth from the starting note, played at the same time. For instance, we can play the note A and E at the same time to create an A power chord (often notated as A5). The E is up the interval of a fifth from the A. This makes sense if you assign a number to each musical letter, so if A is 1, B is 2, C is 3, D is 4, and E is 5. Be sure to grab your guitar tuner!
A fifth is a very natural and neutral-sounding interval to any starting note, because it vibrates at exactly 1.5x the frequency. It’s very complimentary and doesn’t really have any color or mood to it, but what it does is it thickens up the starting note, and gives it a more powerful sound, especially when distortion is added! You can basically take any riff and turn it into a power chord riff by adding fifths to each note! But remember, power chords and barre chords are not the same.
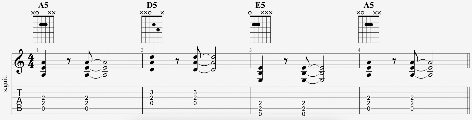
The best way to start playing power chords is in open position. The E, A and D power chords have been used together to create countless classic rock and rock riffs. There are tons of easy guitar songs which you can play using only power chords. As you can see in the graphic below, there are three notes per chord. This is because we have the starting note on the open string, then we go over two frets and down one string to get the fifth, and then right below the fifth on the next string is the octave of the starting note, meaning the same note, just vibrating twice the frequency so it’s higher in pitch. For the D power chord, it’s slightly different because of how the guitar is tuned. For this one the octave is over one fret and down one string from the fifth. For the E and A powerchords, see if you can just use your index finger to play the fretted notes. For the D power chord, use your index and ring finger:
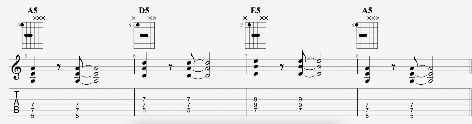
Now we can move the E and A power chord shape all over the neck, but instead of starting with an open string we start on a fretted root note on the E or A string and then go over two frets, down one string for the fifth, and then down another string for the octave. See if you can play the same progression, but now using these power chords, higher on the neck. Use your index finger on the lowest note, then your ring finger on the middle note and your little finger on the highest note (highest means highest sounding).
To make things easier with both of these examples, you don’t have to add the octave to play the power chord. Sometimes it sounds better, and it’s also much easier to just play the root note and the fifth as a two note power chord!
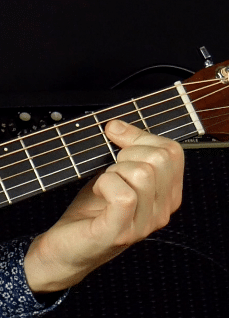
The main challenge with power chords is muting the strings you don’t want to hear. The best way to do this in open position is to angle your fretting finger so that only the strings you want to hear ring out and the others are muted with the flesh of your fingertip.
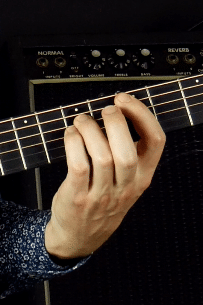
With the power chords higher on the neck, use your index finger to gently touch the open strings so they don’t ring out. Check your chord to make sure you can freely strum all six strings and only here the notes you are pressing down. If you hear any open strings or you’re accidentally pressing down other notes, then check your index finger to make sure it’s slightly touching the other strings and you aren’t missing any, or that you aren’t pressing down.
Now try creating a chord progression both with the open A, D and E power chords, and also with the A, D and E power chords up the neck! Mix and match them to make your own song! With power chords, you’ll be playing guitar quickly and easily.