This is very much a Holy Grail-type quest. By this we mean it will never be fully accomplished but neither would any guitar player want it to be. Part of the joy of learning how to develop your guitar tone is the endless experimentation with your technique and equipment. This is not to say that you can’t learn shortcuts or gain some insights, which can in turn fast-track your own development, from other people along the way. It is for this reason, and for love of the guitar that Dan Davies of “Tune in, Tone up!” is sharing some tonal tips.
- Dan Davies – Guitar Teacher and professional guitarist
- Gary Shilladay – Dan’s student and podcast editor
Part 1 Tone – The human element

What separates poor tone from outstanding sound? How much tone is generated by the equipment that the player is using and how much is down to the guitarist? What is it about tone that captures the imagination and makes someone stop and listen? We hope to answer some of these questions and would encourage you to listen to our four podcast episodes (Episode 1: Guitar Lesson 16a) on this topic to really get to grips with our ideas and hear examples of what we discuss here.
If the guitar is our voice, then our brains and emotions are attuned to the frequencies and tonalities of sounds which create a sense of familiarity in the listener; something recognisable. By this reasoning, the sounds we are most moved by are the ones which resonate within us and connect us with our memories. These tones help to build an image within us from which we extrapolate emotion, pictures and thoughts. Vocal sounds which resonate in similar ways to the ways in which humans speak will make us feel as we do when we listen to people who speak with tonal variety. Musical sounds can make us feel content, safe, anger, fear or heartbreak…the list goes on.
If ever there was a subjective issue for guitar playing then it’s that of ‘tone’. If ‘beauty is in the eye of the beholder’ then musical tone is in the ear of the listener and yet this is not the full story because the player is also key in producing something memorable and of quality. Just like a painter can use high or low quality equipment, equally a guitarist can have a decent amplifier, top-end guitar and expensive pedals or low quality gear. Primarily it is the touch, muscle memory, experience and years of practice which gives them their tone. Picasso or Turner would produce something wall-worthy no matter the quality of their equipment and likewise, Eric Johnson or Jeff Beck would make a cheap Stratocaster sound great through a 1W battery-powered inexpensive amp. The gear, however, does help by offering dynamics, better tuning and added quality, sustain and choice. We would both rather listen to Eric Clapton playing Old Blackie than a beat-up £30 nylon string acoustic.
Let’s look first at the player. As a guitarist you can improve the various aspects of your playing through practice and technique. For example you can start with
- Muting strings more effectively so that your sound is cleaner and more confident
- Fretting more accurately and experiment on where to place your fingers and with differing degrees of pressure to see how all this affects your tone.
- Building better knowledge of the fretboard in order to avoid getting lost and playing the wrong note
- Practising and exploring vibrato, legato, tapping, bending or using harmonics
- Trying different picking styles to become more proficient at controlling your sound from the guitar.
In all these ways (and many others) you can massively improve your tone and your touch. Taking the time to really experiment with all the different ways you can connect with your instrument will be of great benefit and introduce subtlety and dynamics into your playing.

There is also a need to eliminate the negative parts of your tone. Half the battle with the electric guitar is taking an instrument which is capable of producing some pretty awful sounds and gaining control of it so it makes the noises you want it to. In this way your practice is like taming a wild beast.
When it comes down to a player’s individual touch on the guitar this is really hard to quantify. As Dan says to all his students “you sound like you regardless of your abilities and nobody does you better than you do!” Whether it is your touch, or that of Steve Vai, Eric Clapton, Nile Rodgers, Jimi Hendrix or Stevie Ray Vaughan, each is very personal and different. Understanding tone better helps you to make informed choices about your approach but at the end of it all, you will still be you.
Your upbringing, the music you were shaped by, your breadth of musical experience, the instruments you love the sound of, how wild your imagination all go into the cauldron along with your present emotions, who you are playing with and who your audience is. These things will in time filter down naturally into your playing and you will become the player you have worked towards being. The sooner you realise that this is not a passive process but an active one, the better because then you can make goal-directed decisions about the type of sound you want to have.
While it’s good to be able to play other musicians’ music and this is a perfectly normal part of learning, it’s good for you to develop your own sound and style on the guitar. Ask yourself “how do I want to sound? What do I want to say?” This may even lead you to wonder “do I have anything to say?” If not then extra work is required.
Part 2 – Guitars, amplifiers and other gear
It’s undeniable that the gear you use will undoubtedly, to a point, influence the tone you get but it would be naive in the extreme to expect that just by obtaining like for like gear of your favourite artist you will automatically sound exactly like them. Having their gear opens possibilities but their touch on the instrument is what really counts.
Let’s look at getting the most out of the gear we’ve got and making some good choices when it comes to choosing what to buy. As this is such a huge topic, we realise that some of the areas outlined below only touch the surface; however, we felt that it was still useful to comment on each; after all you can do further research should you feel the need to or get in touch with Dan should you wish through our website:
- Setting up your guitar: The first step to better, more inspiring tone, is to have your guitar set up properly so it plays, remains in tune and sounds as good as it can. A decent luthier will charge around £35/£40 for a set-up. This will be more expensive if the frets need dressing or other more involved work is required. Even so, all of this is well worth the money.
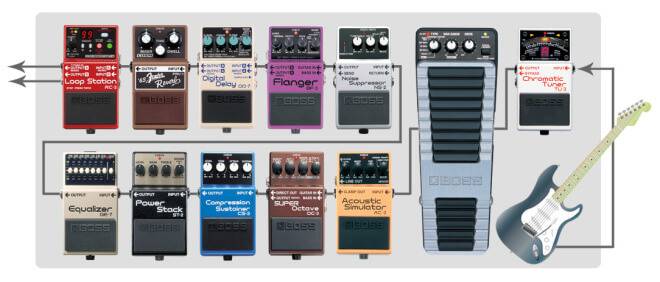
- Wah-wah/EQ/compressor/octave,
- Then boosters/drives/distortion/fuzz,
- Next is modulation: so chorus/phasers/flangers
- Dan likes to go through the FX loop for: echo/delay/reverb (this can also be a good place for an EQ pedal).FX pedal order is important but again you can tear up the rule book if you’ve found something that works better for you and doesn’t follow the ‘rules’.
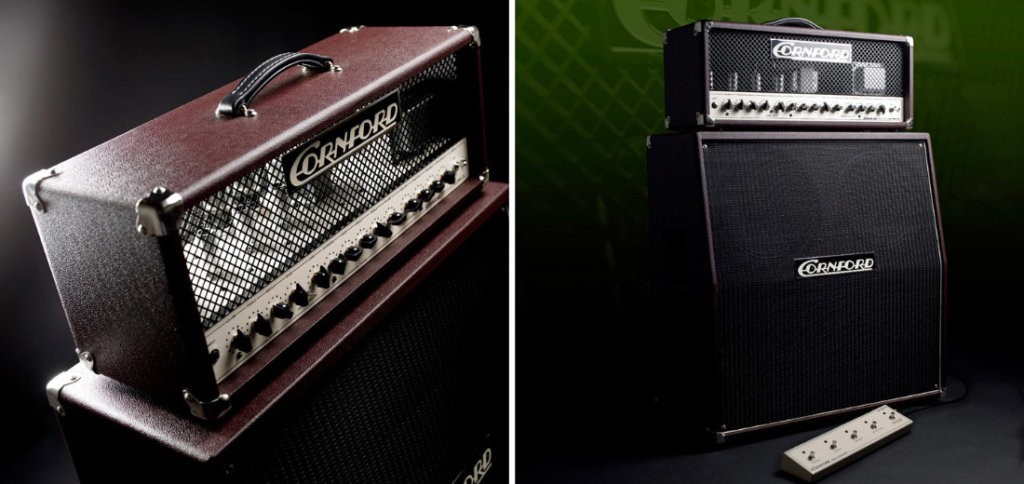
- How big are the venues you play? If you get mic’d up at every show a smaller amp for monitoring your sound on stage might well be enough for your purposes. This can also make an excellent practice amp at home too and if you are choosing a tube amp, then being a lower wattage will mean that you are more likely to get the most from it at the volume you will be playing at.If you rarely get mic’d up (common on the pub and club circuit) then you’ll need enough volume to be heard from your backline (the amplifiers used for guitars and other instruments, typically placed across the back of the stage). Consider the size of the venues and how many people there will be in them when choosing the output.
- Do you use clean sounds a lot? Then you’ll probably need more headroom (how far you can turn up an amplifier before its clean tone begins to distort) so that you can still be heard in the mix. A typical tube amplifier has two stages: The pre-amp, which distorts the signal from your guitar, and the output valves, which amplify the signal coming from the pre-amp. Overdriven tones only seem louder because of the gain or amount of distortion which is applied to your signal.
- Should you use a single-channel or multi-channel amp? This depends on what you intend to use the amp for. If you get most of your tonal variety from pedals, then a single channel amplifier may well work perfectly for you. If, on the other hand, you want a variety of sounds, without pedals, then a multi-channel amplifier is essential.
- What wattage/power? Although wattage gives you a rough guide to the amplifier’s output there are still too many variables here to get away with applying a single rule when it comes to volume. In certain situations a 15W valve amplifier might actually be all you need for your live performances. 30W to 50W should cover a multiple range of live applications and 100W is more than most need; however, if you like the tone of a 100W amp then you already know that’s the one you’ll buy. Just bear in mind that you will want to be able to use it in a loud situation or you won’t push the valves enough to get the sweetest tones. This can be frustrating, although a good solution may well be to purchase an attenuator (see below) so that you can drive the valves while still controlling the volume after the output.
- What cabinet should you get? A decent cabinet can really bring an amp to life, so you may regret saving money in this area. If you are going down the head ‘n’ cab route, be realistic. Are you going to be playing stadium gigs? If you are, then a bevy of 4 x 12s might be suitable for on stage monitoring not to mention getting the most from your wet-dry-wet set up (where your amp signal is split into three outputs and given to the sound guys to mix). This same setup, however, will certainly be an overkill for playing the Dog ‘n’ Duck on the High Street on a Friday night and your back will suffer from the endless lugging around. You need to get the air and speakers moving and working or you will not be happy with your tone and in a small venue you will not be able to drive a 100W head sufficiently to do this. In my experience a 1 x 12 (or 2 x 12 if you play larger gigs) should cover a multitude of gig requirements. It’s what Dan uses and he plays a whole host of different gigs from small pubs where you don’t mic up, to reasonably large venues where you do and a 2 x 12, together with an attenuator, gives him a wide variety of amp outputs and the right volume level for each gig.
- Do I need an attenuator? Sometimes referred to as power scaling, either included as part of the amplifier’s design or as a separate unit which sits between the amp and the cab, an attenuator allows you to run your valve amp hot (volume) cranked up for tone without the actual volume level being too much.
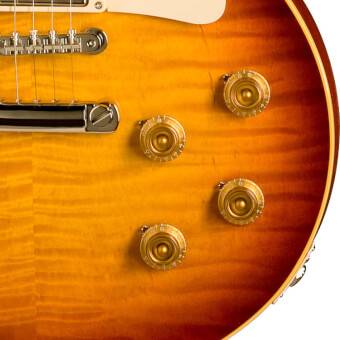
- If you can make the most of the basic tones you have at your disposal (e.g. clean, drive, high gain etc.) then it’s like painting with a wide palette of colours instead of being limited to primary colours. Using the guitar’s volume control allows you to access all the different shades between almost clean and quite distorted to get the sweet spot. As a basic rule, the more distorted/compressed your tone the less you’ll be able to dial it back using the guitar’s volume control. Mid gain tones allow for a huge amount of dynamic variation from solely the volume control.
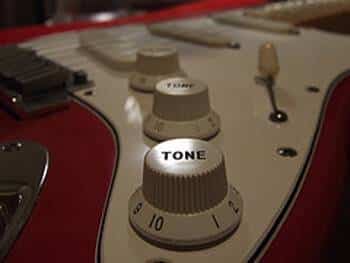
- Many manufacturers wire a capacitor across the guitar’s volume pot, which is referred to as a treble bleed circuit because it actually bleeds the bass off your signal as the volume control is turned down. This in turn thins out your guitar sound as you turn down the volume which stops it getting muddy and can also help by removing some of the boom out from your clean sounds. Alternatively, crank your guitar’s volume all the way up for some thicker sounding single notes. Not all guitars have a treble bleed circuit, but most do. Take the time to get to know your guitar and become accustomed with how the volume and tone controls work. You will probably find that the ‘sweet spot’ for different sounds will be different for each guitar you own or play.
- Les Paul wiring – 2x humbuckers each with volume and tone offers up some unique possibilities. Sometimes humbucker guitars aren’t always seen as the ideal vehicles for bright, chiming, clean sounds; however, with some foreknowledge these sounds can be dialled in. Try this: Put the pickup selector switch into the middle position, activating both pickups and their respective volume and tone controls. Now dial back the neck/rhythm pickup level and mix in a little more of the bridge/treble pickup, keeping the tone controls maxed out at 10. Ensure that you keep both volume controls below 8 in order to engage the treble bleed circuit and you’ll get a less top-heavy -usable tone perfect for use with a clean sound. Dial in and play with a country twang.
- Experiment – get to really know your guitar, see how many sounds you can get without touching the amp. Can you go from clean to crunch to solo? Can you get thin sounds, fat sounds and everything in between? You should be able to but it really takes time to master. The volume control on your guitar is a gateway to a whole host of tonal variety. Multiply that by the channels on your amp and/or the pedals which affect your core tone and you’ll have a plethora of sounds to choose from and dial in, much of which is underneath your right hand and readily accessible on your guitar’s body.
- Gaining control over your guitar and its sounds has many advantages: You’ll extend the range of your amplifier and guitar making the most of what each have to offer. Each guitar brings a very different vibe to your tonal output and the musical atmosphere. Knowing you can control your guitar and get out of it what you want gives you the confidence to try out instruments you might have previously pigeon-holed as being only useable in certain musical styles or situations. By mastering the potentiometers and pickup switching, you’ll get smoother transitions from one sound to another, tidier performances and less nasty unexpected guitar noises, especially at the end of songs and solos.
As always with our lessons at Tune in, Tone up! (TITU) we love to hear back from our readers and listeners. Please do get in touch via one of the methods below with any suggestions, feedback or support.
- Listen to our free guitar lessons podcast: https://soundcloud.com/tunein-toneup
- With our supporting website: https://tunein-toneup.com/.
- You can also listen on iTunes at itunes.apple.com/gb/podcast/tune-…d1187509288?mt=2
- Like us on Facebook: https://www.facebook.com/tuneintoneup/
- Follow us on Twitter: https://twitter.com/Shillers13
- Read our magazine on Flipboard: https://flipboard.com/@garyshilladay/lessons-and-gear-for-guitar-geeks-and-fanatics-4hn1ma1my
A great way to consume Tune in, Tone up’s (TITU) content: free guitar lessons, hints, tips and thematic ideas. Listen in the car, while in the gym, running, walking, or about the house. Stick your headphones in, sit back and learn how to play the guitar. https://soundcloud.com/tunein-toneup/sets/tune-in-tone-up
Topics include: Modes, learning away from the guitar, proper jamming etiquette, country, blues, how to improvise better solos, mixing rhythm and lead playing, rhythmic fills, studies of the styles of great guitarists like Jimi Hendrix, Jimmy Page, Gary Moore, etc., rocktastic riffs and pinch harmonics and much, much more to come